Outlook or Moodle Meetings
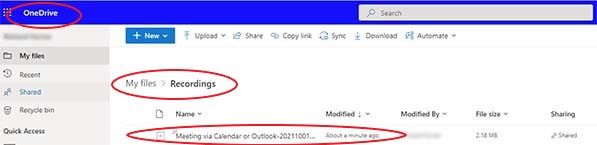
Meetings arranged via the Outlook or Moodle Calendars will be stored in a folder called "Recordings" at the top level of OneDrive for Business. The recording will be saved in the OneDrive of the individual who started the meeting recording.
To access OneDrive for Business, go to Office.com and log in to Microsoft. Select OneDrive from the list of applications.
Within OneDrive for Business, a top-level folder called Recordings will be created.
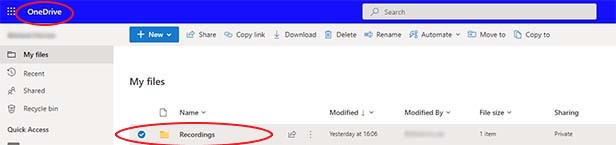
The recording of your meetings will appear within this folder.
People invited to the meeting can access the recording by clicking on the chat history of the meeting in Teams. You can share the recording with others by Sharing OneDrive files or folders.
Microsoft Teams Channel Meetings
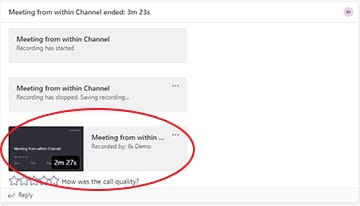
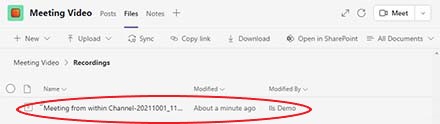
Meetings arranged within a Team or a Teams Channel will be available via the Channel chat, and are saved in a folder called "Recordings" in the files area of that Team or Team Channel.
Channel recordings appear in the Channel history
Within the Channel, select the Files tab at the top of the screen. A Recordings folder will folder exist.
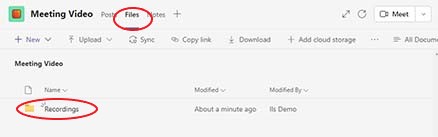
The recording of your meetings will appear within this folder.
You can share the recording with others by Sharing SharePoint files or folders.
Recording saved to Microsoft Stream
Your previous meetings which were saved in Stream will remain in Stream.
When a Teams event is recorded, it will be processed in Stream and automatically made available to those who attended. It is possible to assign access to others, or indeed to restrict access or even delete the recording entirely from the Stream interface.
How to check and edit permissions on your Stream recordings
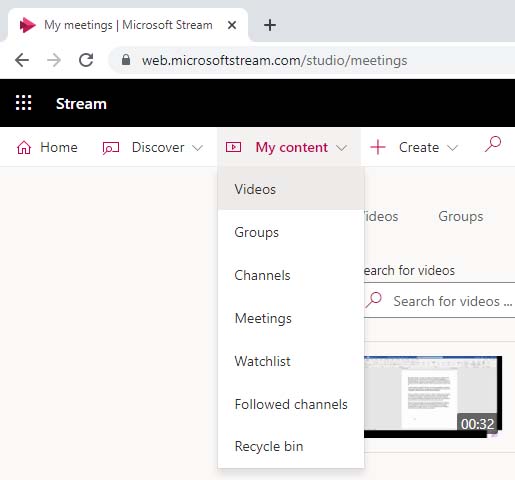
- Go to login.gre.ac.uk and go to the Stream app from the main Microsoft 365 dashboard. If the Stream icon is not visible, click on the menu icon (nine dots) to view the expanded list of applications
- Within Stream, Select the Videos tab (or Videos from the My content dropdown) to display all your content or choose the Meetings tab (or Meetings from the My content dropdown) to show only your recorded meetings.
If you have just made a recording, it may take a few minutes to appear
- Locate your recording from the list
- The yellow visible to private icon should appear alongside it

- To check and edit further details, select the Update video details (pencil) icon

- In the first (Details) panel, you can rename your video, provide a short description and select a thumbnail if you wish
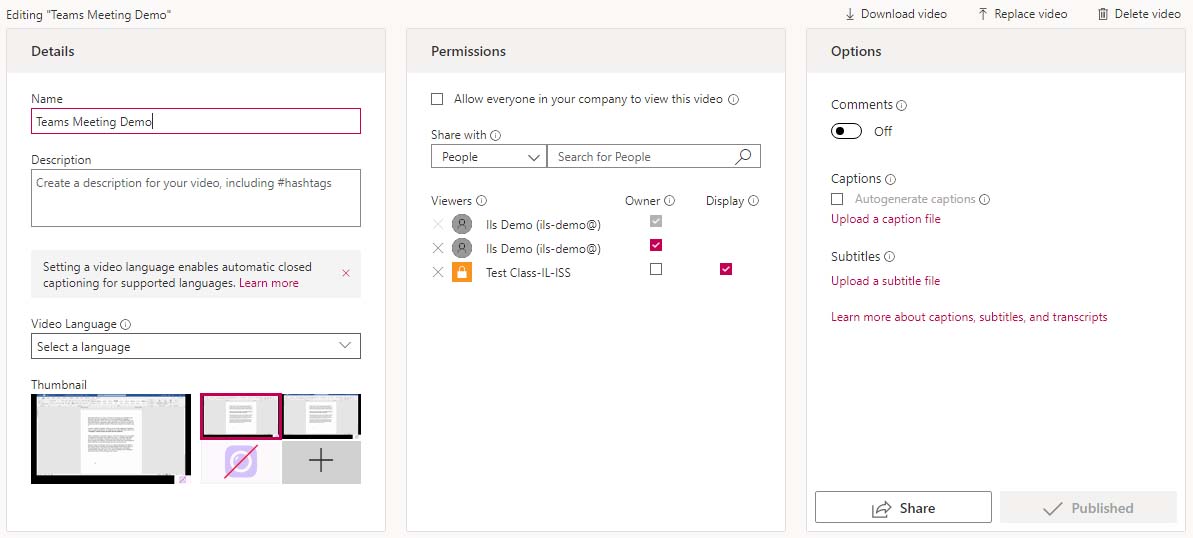
- In the Permissions panel, you can see and edit who has view and ownership rights of the video
- If Allow everyone in your company to view this video is ticked, please untick it
- Everyone in your company means all staff and students with a Microsoft 365 account will be able to view your meeting
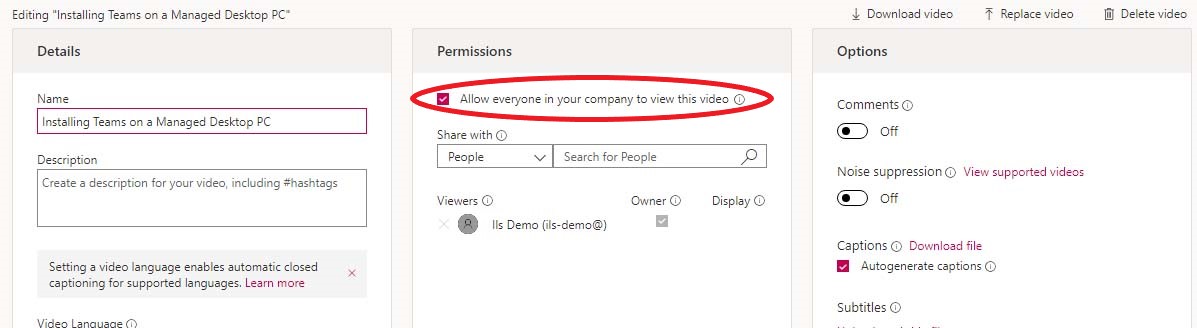
- This setting is denoted with a green (company) icon in place of the yellow visible to private one, so if any of your recordings are set to all company, it is recommended that you edit the permissions and remove all company access unless you are absolutely certain it should be accessible to all

- Please note that Stream will automatically assign ownership of the recording to the person who pressed record in the meeting – which may not necessarily be the person who organised it
- Stream will also automatically assign view access to whoever was in the meeting group and publish the video once it has been processed
- In the Options panel, you can turn on and off viewers' ability to post comments
- Stream will automatically create captions for the recording, if your language is set to "US English" see these instructions on how to generate automatic captions and a transcript for your Microsoft Stream videos. Please note that it may take a while for captions to be made available.
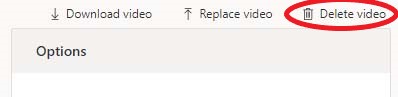
- You are also able to delete the recording from this screen – which you should do when it is no longer required
- Finally, click Apply to save your changes and return to the video screen
